
I’m often amazed by the fact that people who don’t know how to knit think about knitting as something easy. Something that you learn once and then you just “know how to do it”. Similar to learning how to crawl, speak or walk.
When, in fact, the contrary is true.
Yes, you can learn how to do a knit and a purl stitch in an afternoon. But those are just the very basics. Knitting is so much more. It’s complex, creative, challenging (usually in a good way) and, at the same time, it’s relaxing, tactile and grounding. There is always something new to learn, a new technique, a new construction, different fibers to try out.
In short, the learning opportunities are endless. And so are the number of things that can go wrong in a knitting project.
Over the years, I have made countless mistakes in my knitting (and I still do!). But one of the beautiful things about knitting is the fact that almost nothing is permanent. You can (with some rare exceptions) always unravel and start over. So if you are more of a beginner knitter, I hope this will be encouraging to you. Because in this essay I want to share 10 knittings tips that actually make you a better knitter. I have learned all of these tips the hard way, over years of knitting almost daily, and I hope they will help you become a better knitter yourself.
And if you’d rather watch than read, I explore this idea in the video below.
Tip 1: The 2x Rule
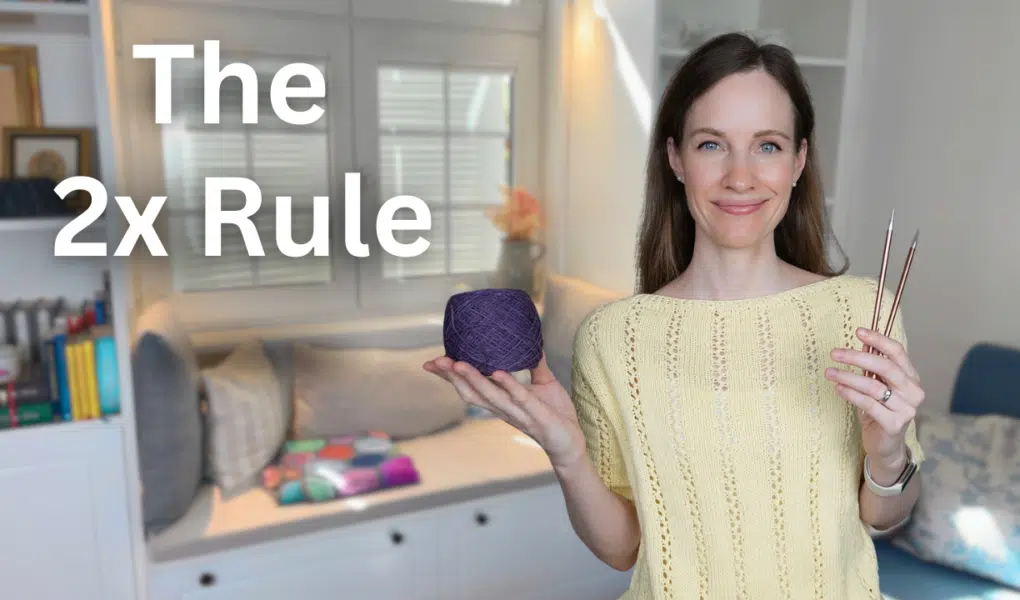
There’s a moment every knitter knows. You look down at your project, something feels off, and you contemplate: should I frog this? But you keep going. A few rounds later, the thought comes back. You ignore it again. By that point you’re twenty rounds deeper and the answer was always yes, you should have frogged it.
That’s what I call 2x Rule. The rule is simple: if you’ve questioned whether to keep going or unravel more than two times, the answer is always unravel.
Now I know what you’re thinking: but I’ve already put so many hours into this. Frogging feels like losing all of that. And I completely understand that feeling, because I’ve been there more times than I can count. But here’s the thing: those hours are already gone whether you frog or not. They don’t come back either way. What you’re actually deciding in that moment is whether to spend the next ten, twenty, thirty hours on something you already know in your gut isn’t right. And knitting takes too long for that. We’re not talking about a quick afternoon project most of the time, we’re talking about weeks of your evenings, your slow Sunday mornings, your quiet moments. That time is precious and it deserves to go toward something you’ll actually be proud of at the end.
I recently frogged a top I’d been working on for two weeks where all that was left to do was weaving in the ends because the fit just wasn’t what I wanted. I also unraveled a cardigan that was completely finished but I never wore it because the sleeves were too tight. And, honestly, every single time I decide to frog a project, the relief is immediate. And then you get to start fresh with everything you just learned from the version that didn’t work.


So give yourself permission to use this rule. Two doubts is not indecision. It’s your instincts telling you something clearly and consistently. The 2x Rule just gives you a framework to finally listen to them.
Tip 2: Cast on with a larger needle
The second tip is so small and simple that it almost feels like it shouldn’t make a difference. And yet the first time you do it, you’ll wonder why nobody told you sooner.
So the next time you cast on, use a needle one or two sizes larger than the one your pattern calls for. Or if you don’t want to dig through your needle collection, just cast on over two needles held together, then slip one out before you start your first row. I always do this when I cast on for a pair of socks.
The problem it solves is one a lot of knitters don’t even realize they have. When you cast on at your regular needle size, that edge can end up slightly tighter than the rest of your fabric. And only once you block the finished piece, and the body opens up beautifully, you will notice that the cast-on edge stays a little stiff and resistant. It fights the fabric instead of moving with it.
The frustrating thing is that it’s pretty much invisible until the project is finished. You don’t notice it row by row. You only notice it when you try the sweater on and the hem sits oddly, or when your sock cuff digs in just slightly more than you’d like.
Personally, I do this automatically now. It’s one of those habits that becomes so ingrained you stop thinking about it, you just always reach for the bigger needle. And it costs you nothing. No extra time oe materials, just a slightly more relaxed cast-on edge that will thank you for the entire life of the garment.
Tip 3: Match yarn properties to your pattern not just weight
When it comes to substituting yarns in knitting patterns, we usually talk about yarn weight. And while weight matters — if your pattern calls for a DK and you use bulky weight yarn, you’re going to have a bad time – it is actually the easier problem to solve. You swatch, adjust your needle size, and do the maths. It’s definitely doable.
What’s much harder to compensate for — and what I see trip knitters up again and again — are yarn properties. The way a yarn behaves, whether it drapes or holds its shape, whether it has a halo, or a sheen, or a lot of texture. Whether it’s spun tightly or loosely. These things are not interchangeable, and no amount of swatching will change them.
For example, if you think about a classic flowy summer top (the kind with delicate stitch definition and a beautiful drape that skims the body), that pattern was most likely designed with a yarn in mind that moves. Like a silk yarn, for example. If you knit it in a yarn with a lot of structure and bounce — a woolly, springy yarn — the finished piece will look completely different to what you imagined. Not necessarily always bad, but certainly different. The stitches will pop in a way they weren’t meant to, the drape won’t be there and he whole feeling of the garment changes.
And it goes the other way too. A yarn with a lot of drape knitted into a textured stitch pattern — cables, bobbles, anything three-dimensional — will just collapse. Those beautiful raised textures need a yarn with memory and structure to hold their shape. A drape-y yarn will swallow them.
So before you fall in love with a yarn and immediately pair it with whatever pattern you’re currently excited about, ask yourself one question first: what does this pattern actually need to look the way it looks in the photos? Is it the drape? The stitch definition? The softness? The structure? And then ask whether your yarn can give it that.
Tip 4: Gauge swatch more
You probably already know you should swatch. Every knitting resource in existence tells you to swatch. And yet — and I say this with complete solidarity — most of us have at some point cast on without one, told ourselves the gauge would work out, and then spent three weeks knitting something that didn’t fit.
I’m not here to tell you to swatch, because you know that. What I want to talk about is how to swatch in a way that actually gives you useful information, because there are a few things most people don’t do that make all the difference.
The first one is measuring your swatch both before and after blocking. This sounds obvious when you say it out loud, but it’s surprisingly easy to skip.
You either knit your swatch, you count your stitches and think: great, I’m at gauge, let’s go. Only to realize afterwards that the yarn changes drastically once it’s been blocked. For example, a merino swatch can grow by half a centimeter per ten stitches after blocking. A cotton yarn might relax completely. A loosely spun single ply can bloom into something entirely different. If you only measure before blocking, you’re measuring a version of your fabric that will never exist again the moment you wash the finished piece.
But on the other hand, if you only measure after blocking, you might not be aware of how much the yarn transforms through the blocking process. So you might start knitting and then the project starts looking way too small. And then you panic, frog and cast on for a larger size. Only to realize afterwards, once the garment is fully knitted and blocked, that it grew so much that the initial size you chose would have been the correct one.
So knit your swatch, measure it, then wash it the way you plan to wash the finished garment, lay it flat to dry, and then measure it again.
The second important thing is rechecking your gauge as you go. Because your tension changes. It changes when you’re relaxed versus when you’re stressed. And it can also change when you’re knitting on the sofa versus at a desk. Or it might change as you get more comfortable with a yarn, or as you settle into a project after the first few rows of slight awkwardness.
So every now and then, take a moment to measure. Not obsessively, of course, just a quick check. Are you still hitting the stitch count you need over ten centimeters or 4 inches? If you’ve drifted, you can adjust. Maybe you go up or down a needle size. Maybe you consciously relax your tension a little. The point is that you catch it while it’s still fixable, not when you’re weaving in the ends and realizing that something is off.
Tip 5: Use stitch markers generously
Stitch markers are one of those things where more is almost always better. I don’t think I’ve ever finished a project and thought: I used too many markers on that. But I’ve absolutely finished projects and thought: I really should have used more.
The obvious use is marking the beginning of a round, or the points where you increase and decrease. Most knitters do that already. But I want to talk about a more specific application that will save you an enormous amount of time and frustration if you ever knit lace: placing markers between every single repeat.
Here’s why: lace is unforgiving in a very particular way. A mistake in a cable or a textured stitch is usually visible, you can see something looks wrong and investigate. A mistake in lace often stays invisible until you try to work the next row and suddenly nothing lines up. You’re one stitch off somewhere, you have no idea where, and you’re facing the prospect of tinking back an entire row of yarn overs and decreases — which is genuinely one of the least enjoyable experiences in knitting.
But if you have a marker between every repeat, you know exactly where the mistake is the moment something doesn’t add up. You reach a marker and you’re one stitch short — the problem is in this repeat, right here, not somewhere in the previous forty stitches. You tink back just those few stitches, fix it, and carry on. What could have been twenty minutes of painful unknitting becomes thirty seconds.

And this extends beyond lace too. Any time you have a long repeat — colorwork, a textured pattern, even an increase section on a raglan — markers give you that same safety net. They break a large, intimidating number of stitches into small, manageable sections that you can check off one at a time.
Pro tip: and if you want to feel even more at ease and know that even if you do make a mistake, it is easily fixable: use a lifeline. A lifeline is a strand of scrap yarn (or you can even use dental floss) that you thread through a row or round of stitches. You do this in regular intervals all throughout the project. It is like a safety net, because if you do have to unravel several rows (or rounds) you can simply unravel to the point of the lifeline without being afraid of dropping any live stitches.
Tip 6: Check the fit and adapt freely
This might be the tip that has saved me the most finished objects over the years. And it’s not a technique, it’s a habit: Try on your knitting. Do it often, more than you think you need to.
I know that sounds simple. But I see so many knitters (and I’ve been guilty of this myself) who treat the pattern like a contract. The pattern says to work until the piece measures 10” or 25 cm, so they work until the piece measures 10’’/20 cm, and then they move on. And then they finish the whole thing, try it on, and realize that 10’’/25 cm doesn’t actually work for their body. Maybe the waist shaping hits in the wrong place, or the sleeve is too short, or the yoke sits slightly higher than it should for their proportions.
Just keep in mind: patterns are written for an average. And there is simply no such thing as an average body. You have to work with the measurements your body: with its particular proportions, its preferences, the way you like things to fit. No pattern writer has met you. They don’t know that you have long arms, or a shorter torso, or that you prefer your sweaters to hit at the hip rather than the waist. You’re the only one who knows that.
So try it on or at least hold it up against your body. You can also use a tape measure and compare against a garment you already love. Ask yourself: is this going where I want it to go? If the answer is no, or even maybe, adjust. The pattern is a guide, not a rule.
For example, I have really long arms. And for years I knitted sleeves to the length patterns told me to, and they were always slightly too short, and I always told myself it would be fine after blocking, and it was almost never fine after blocking. Now I automatically add length. Every single time. It takes me just a couple more minutes to do and it makes the difference between a sweater I wear all the time and one that sits in the back of my wardrobe feeling slightly wrong because once I wear it I constantly find myself pulling at the sleeves.
Your handmade wardrobe should fit you, not a fictional average person. The whole point of making things yourself is that you have complete control over the outcome. Use that. Try things on, make adjustments without guilt, and trust your own judgment over the numbers in a pattern.

Tip 7: Avoid rowing out
This tip is for anyone who has ever knitted a flat stockinette project, held it up, and noticed these faint horizontal ridges running through what should be smooth, even fabric. One row slightly looser, one row slightly tighter, alternating all the way up. It has a name — it’s called rowing out — and if you’ve experienced it, you’ll know how frustrating it is, because no matter how carefully you try to even out your tension, it just keeps happening.
Here’s what’s actually going on: for most knitters, purl stitches sit slightly looser on the needle than knit stitches. Not dramatically, just enough that when you’re working flat and alternating a knit row with a purl row, those two rows end up at slightly different tensions. The knit rows are neat and even. The purl rows are just a tiny bit looser. And when you look at the right side of your stockinette, you can see it.
The frustrating thing is that this isn’t really a tension problem you can practice your way out of. It’s structural. It has to do with the mechanics of how a purl stitch is formed: the yarn travels a longer path than it does for a knit stitch, which means it naturally uses slightly more yarn and sits slightly larger on the needle.
And this can be particularly annoying when you knit a garment where the yoke is knitted flat and the rest of the body is knitted in the round. It can become very noticeable there. This is an example of a sweater I knitted years ago that shows this issue beautifully:

But there is a fix, and it’s actually very simple. When you’re working the wrong side (the purl row) use a needle one size smaller than your main needle. Just for that row. And use your regular needle for the knit rows. The smaller needle compensates for that slightly looser purl tension, and your fabric comes out even.
If you have interchangeable needles this is very easy to set up, you just attach two different sizes to either end of your cable.
This is one of those tips that feels almost too simple for how well it works. And it’s the kind of thing that most patterns will never tell you. But for flat knitting — blankets, scarves, sweater pieces worked flat, anything where you’re alternating knit and purl rows — this small adjustment hugely transforms your fabric.
Tip 8: How to pull from your yarn cake
This one genuinely surprised me when I first understood what was happening and I only learned about this very recently. I think it’s one of those things that’s so easy to miss precisely because the problem doesn’t look like what it is.
You’ve probably pulled yarn from the center of a cake before. It’s convenient: the cake sits still, it doesn’t roll around, the yarn feeds smoothly. It feels like the smart, tidy way to work. And then at some point you look down at your yarn and notice it’s twisting on itself. Little corkscrews forming as you knit, the yarn spiraling and fighting you. And you think: is this a tension problem? Is something wrong with the yarn? Did I wind it incorrectly?
What’s actually happening is this: yarn is spun with a twist built into it (that’s part of what holds the fibers together and gives it structure). When you wind yarn into a cake, you’re rotating it around a central axis. And when you pull from the center, you’re unwinding it from the inside out; which adds or reduces twist to the one that’s already there, depending on the direction you’re pulling. For every meter of yarn you pull through, you’re adding influencing the spin. Over the course of a whole project, that adds up significantly.
The fix is simple: pull from the outside of the cake instead. Let the cake rotate as you work: either by placing it on a yarn bowl, a spindle, or even just a smooth surface where it can turn freely. The yarn unwinds naturally without adding or subtracting any extra twist, and that corkscrew problem disappears.
Now I know some of you are thinking: but the whole point of a cake is that it doesn’t roll around. And that’s fair. If you use a yarn bowl or a lazy kate or anything that lets the cake spin in place, you get the best of both worlds. The cake stays contained, the yarn feeds smoothly, and you’re not fighting that added twist.
And why does the twist matter beyond the yarn just looking a bit unhappy? Because it affects your stitch definition. A twisted yarn produces stitches that are slightly uneven — particularly visible in ribbing, where you might notice that one leg of the stitch looks wider or tighter than the other, and you can’t work out why. You can have perfect tension, perfect needles, perfect everything else, and still end up with fabric that doesn’t look quite right, because the yarn itself has been compromised by the way you were feeding it.
Now, this issues can be less or more significant, depending on the type of yarn you’re using.
- textured and multi-ply yarns:
Yarns with “tooth” (like wool or sticky wool-blends) or multiple plied strands naturally grab onto each other, which prevents the twist from traveling down the strand too wildly. - slippery or single-ply yarns:
Single-ply yarn, alpaca, silk, or cotton can easily untwist or over-twist because the fibers are smooth. Pulling these from the center frequently causes them to kink, distort, or break.
- fuzzy yarns:
Yarns with a halo (like mohair or brushed suri) can grab and felt onto themselves in the center, causing massive knots.
It’s one of those things that once you know it, you can’t unknow it. And it’s such an easy adjustment to make. So, if you’re using a single ply, slippery or fuzzy yarn, let your cake spin.
Tip 9: How to get neater edges
If you’ve ever knitted something flat and found yourself slightly disappointed by the edges — they’re not terrible, just a little uneven, a little wobbly, not quite as clean as the rest of the fabric — this tip is for you. And it’s possibly the smallest change on this entire list relative to the difference it makes.
Slip the first stitch of every row without knitting it. Just move it from your left needle to your right needle, and then continue knitting as normal.
Let me explain why it works, because understanding it makes it much easier to remember to do. When you knit the first stitch of a row, you’re going through that stitch with your needle, wrapping the yarn, and pulling through, the same as any other stitch. But edge stitches are more vulnerable than stitches in the middle of a row, because they only have a neighbor on one side. Every time you work through them, there’s a small risk of stretching them slightly. And that slight stretch, repeated across every single row of your project, is what creates that uneven, slightly loopy edge.
When you slip the stitch instead, you’re not touching it at all. You’re just moving it across. And because you’re doing this at the beginning of every row, each edge stitch ends up spanning two rows instead of one, which naturally creates a neater, more elongated edge stitch that lies flat and even.
A couple of small things to know:
1. When the rest of your row is knit stitches, hold the yarn to the back as you slip.
2. When the rest of your row is purl stitches, hold it to the front.
And one honest caveat: this doesn’t work for every single pattern. Some stitch patterns need you to work that first stitch for the pattern to line up correctly. If you’re following a specific pattern, check whether it specifies an edge stitch treatment. But for anything you’re knitting without a strict stitch pattern on the edges — which is most things — this is a habit worth building from the very beginning.
Tip 10: Knit for yourself, not the trend
For tip #10, I want to talk about something that isn’t a technique at all. But it’s something I think about a lot, and something that I believe quietly underlies every other tip in this video.
Knit for yourself.
It sounds obvious. Of course you’re knitting for yourself — you’re the one holding the needles. But what I mean is something more specific than that. I mean: before you cast on anything, ask yourself honestly whether this project is genuinely right for you. Not whether it’s beautiful or whether everyone on Ravelry or Instagram or on knitting podcasts is knitting it right now. Whether it is right for you. Your body, your colouring, your life, your wardrobe.
Because here’s what I’ve noticed, in my own knitting and in conversations with so many of you. We spend months on a project. And then we finish it, and we wear it twice, and it lives in the wardrobe. Not because it isn’t beautiful or we didn’t knit it well. But because we chose it for the wrong reasons. We chose it because it was trending or because the yarn was the color of the season. Because we got swept up in the collective excitement of a new release and cast on before we’d really asked ourselves: is this actually me?
And although it sounds counterintuitive because knitting is a slow craft, trends in knitting move fast. A colorway that feels essential in January can feel dated in the fall. A silhouette or stitch pattern that’s everywhere one year quietly disappears the next.
But a sweater you knitted in a color that genuinely suits you, in a shape that fits your body, in a weight that works for your actual climate and your actual life? That’s a sweater you’ll reach for again and again for years.
So before you cast on, look at the garments you already own and actually wear. And ask yourself: What do they have in common? What colours come up again and again? What silhouettes feel like you? And what lengths, what necklines, what sleeve shapes?
That’s your data. That’s more useful than any trend forecast.
The most sustainable and intentional wardrobe you can build is built from pieces you actually wear. And every single one of those pieces starts with a moment of honest self-knowledge before you cast on.
This is something I think about a lot. And it’s at the heart of what we’re discussing over in my online community, The Handmade Wardrobe Circle.
It’s a space where we work through exactly this together: figuring out what our handmade wardrobes should actually look like, choosing projects and yarns with intention, and supporting each other through the making. If that resonates with you, the link is in the description, I’d love to have you there.
And I hope that you’ve learned something new today, from my 10 knitting tips that actually make you a better knitter.


